On this page
App Onboarding Guide
This document provides a detailed, step-by-step procedure for onboarding a new application into the Nexverse platform through the App onboarding dashboard. Follow each step in order and use the accompanying screenshots to confirm that the configuration you submit is complete and ready for review.
Before you begin
- Confirm that you have access to the dashboard, if you do not yet have access contact Nexverse support with your company name and publisher email to request credentials.
- Gather the official store listing URL, the platform bundle or package identifier, and the contact information for the business owner who can respond to compliance queries.
- Decide which ad formats will launch in the first release so the corresponding placements can be created without revisiting the workflow.
- If the store listing is not yet public, prepare a staging or preview link and note the anticipated launch date for the compliance team.
Step 1. Access the dashboard
- Navigate to SSP Dashboard in a modern desktop browser and sign in with your Nexverse credentials.
- Verify that the landing page displays your organisation name in the header and that the catalogue lists any properties you already manage. This confirms you are operating in the correct account and have sufficient privileges.

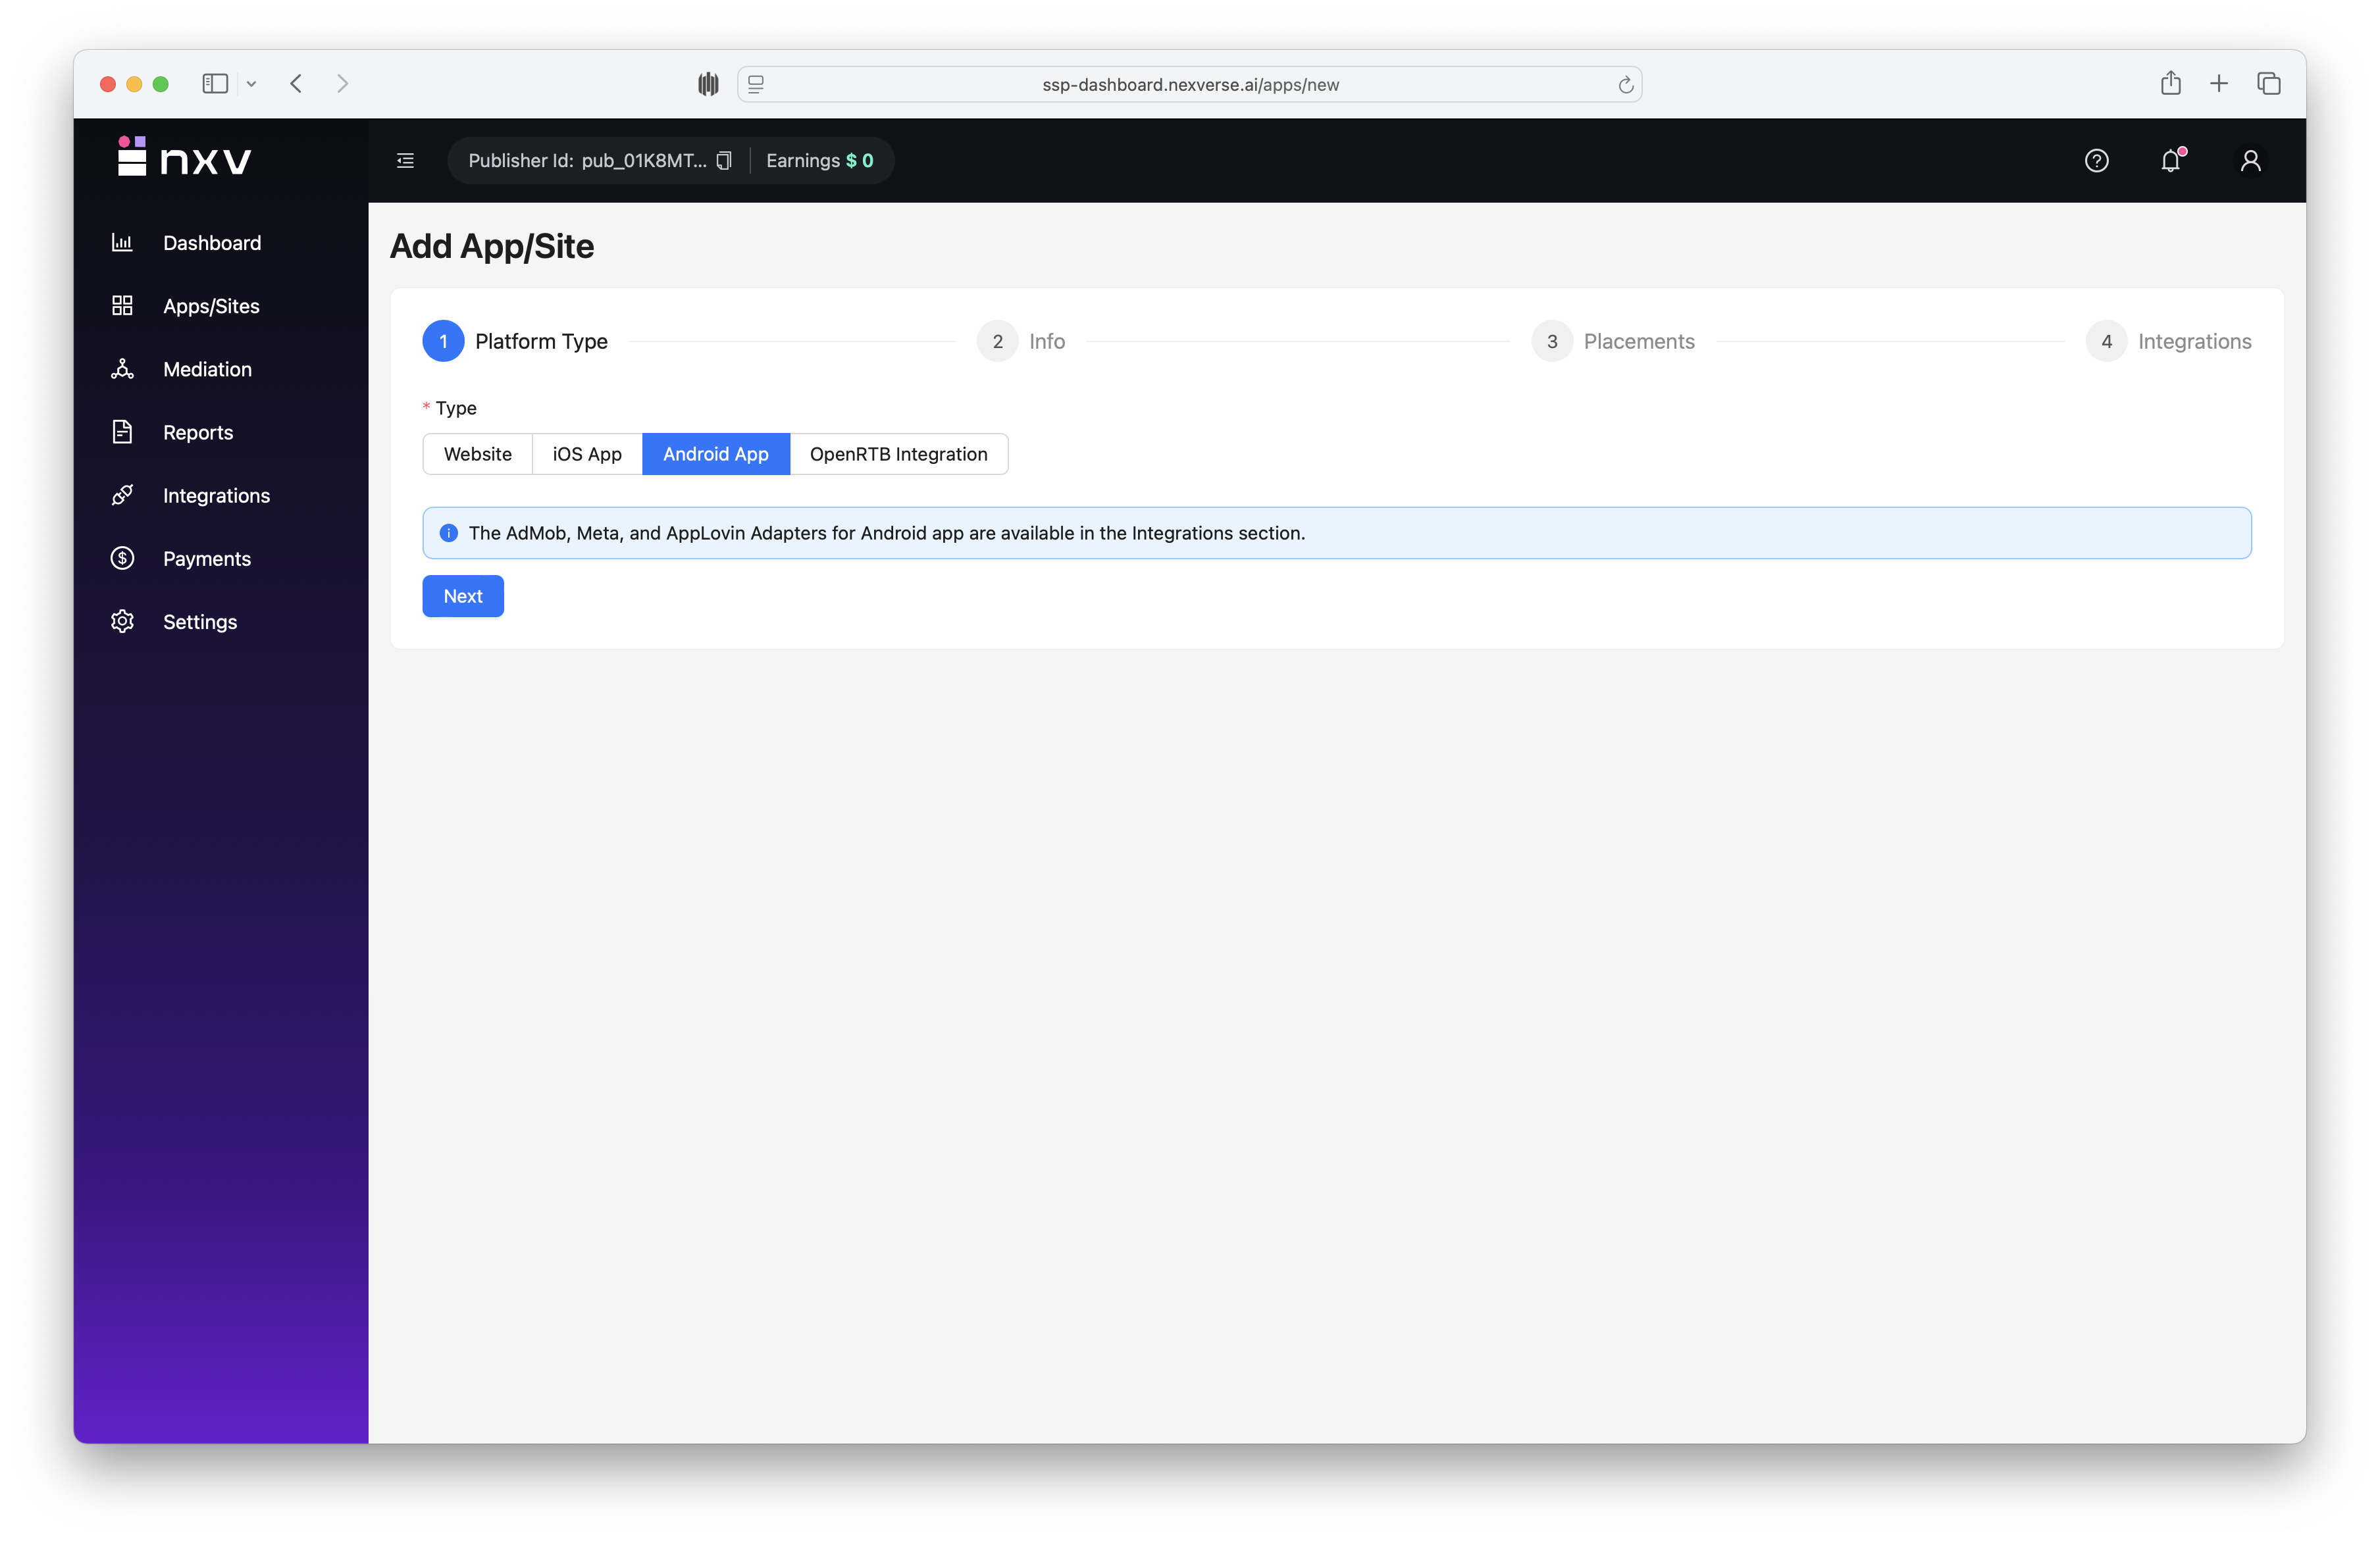
Step 2. Launch the Add App workflow
- Select Add App to initiate the onboarding wizard.
- Choose the platform that matches the build you plan to monetise (Android, iOS, Connected TV, or Web). Selecting the wrong platform creates downstream reporting discrepancies.
- If you are updating an existing property, open the existing record instead of creating a duplicate submission. Duplicate entries delay compliance approval.
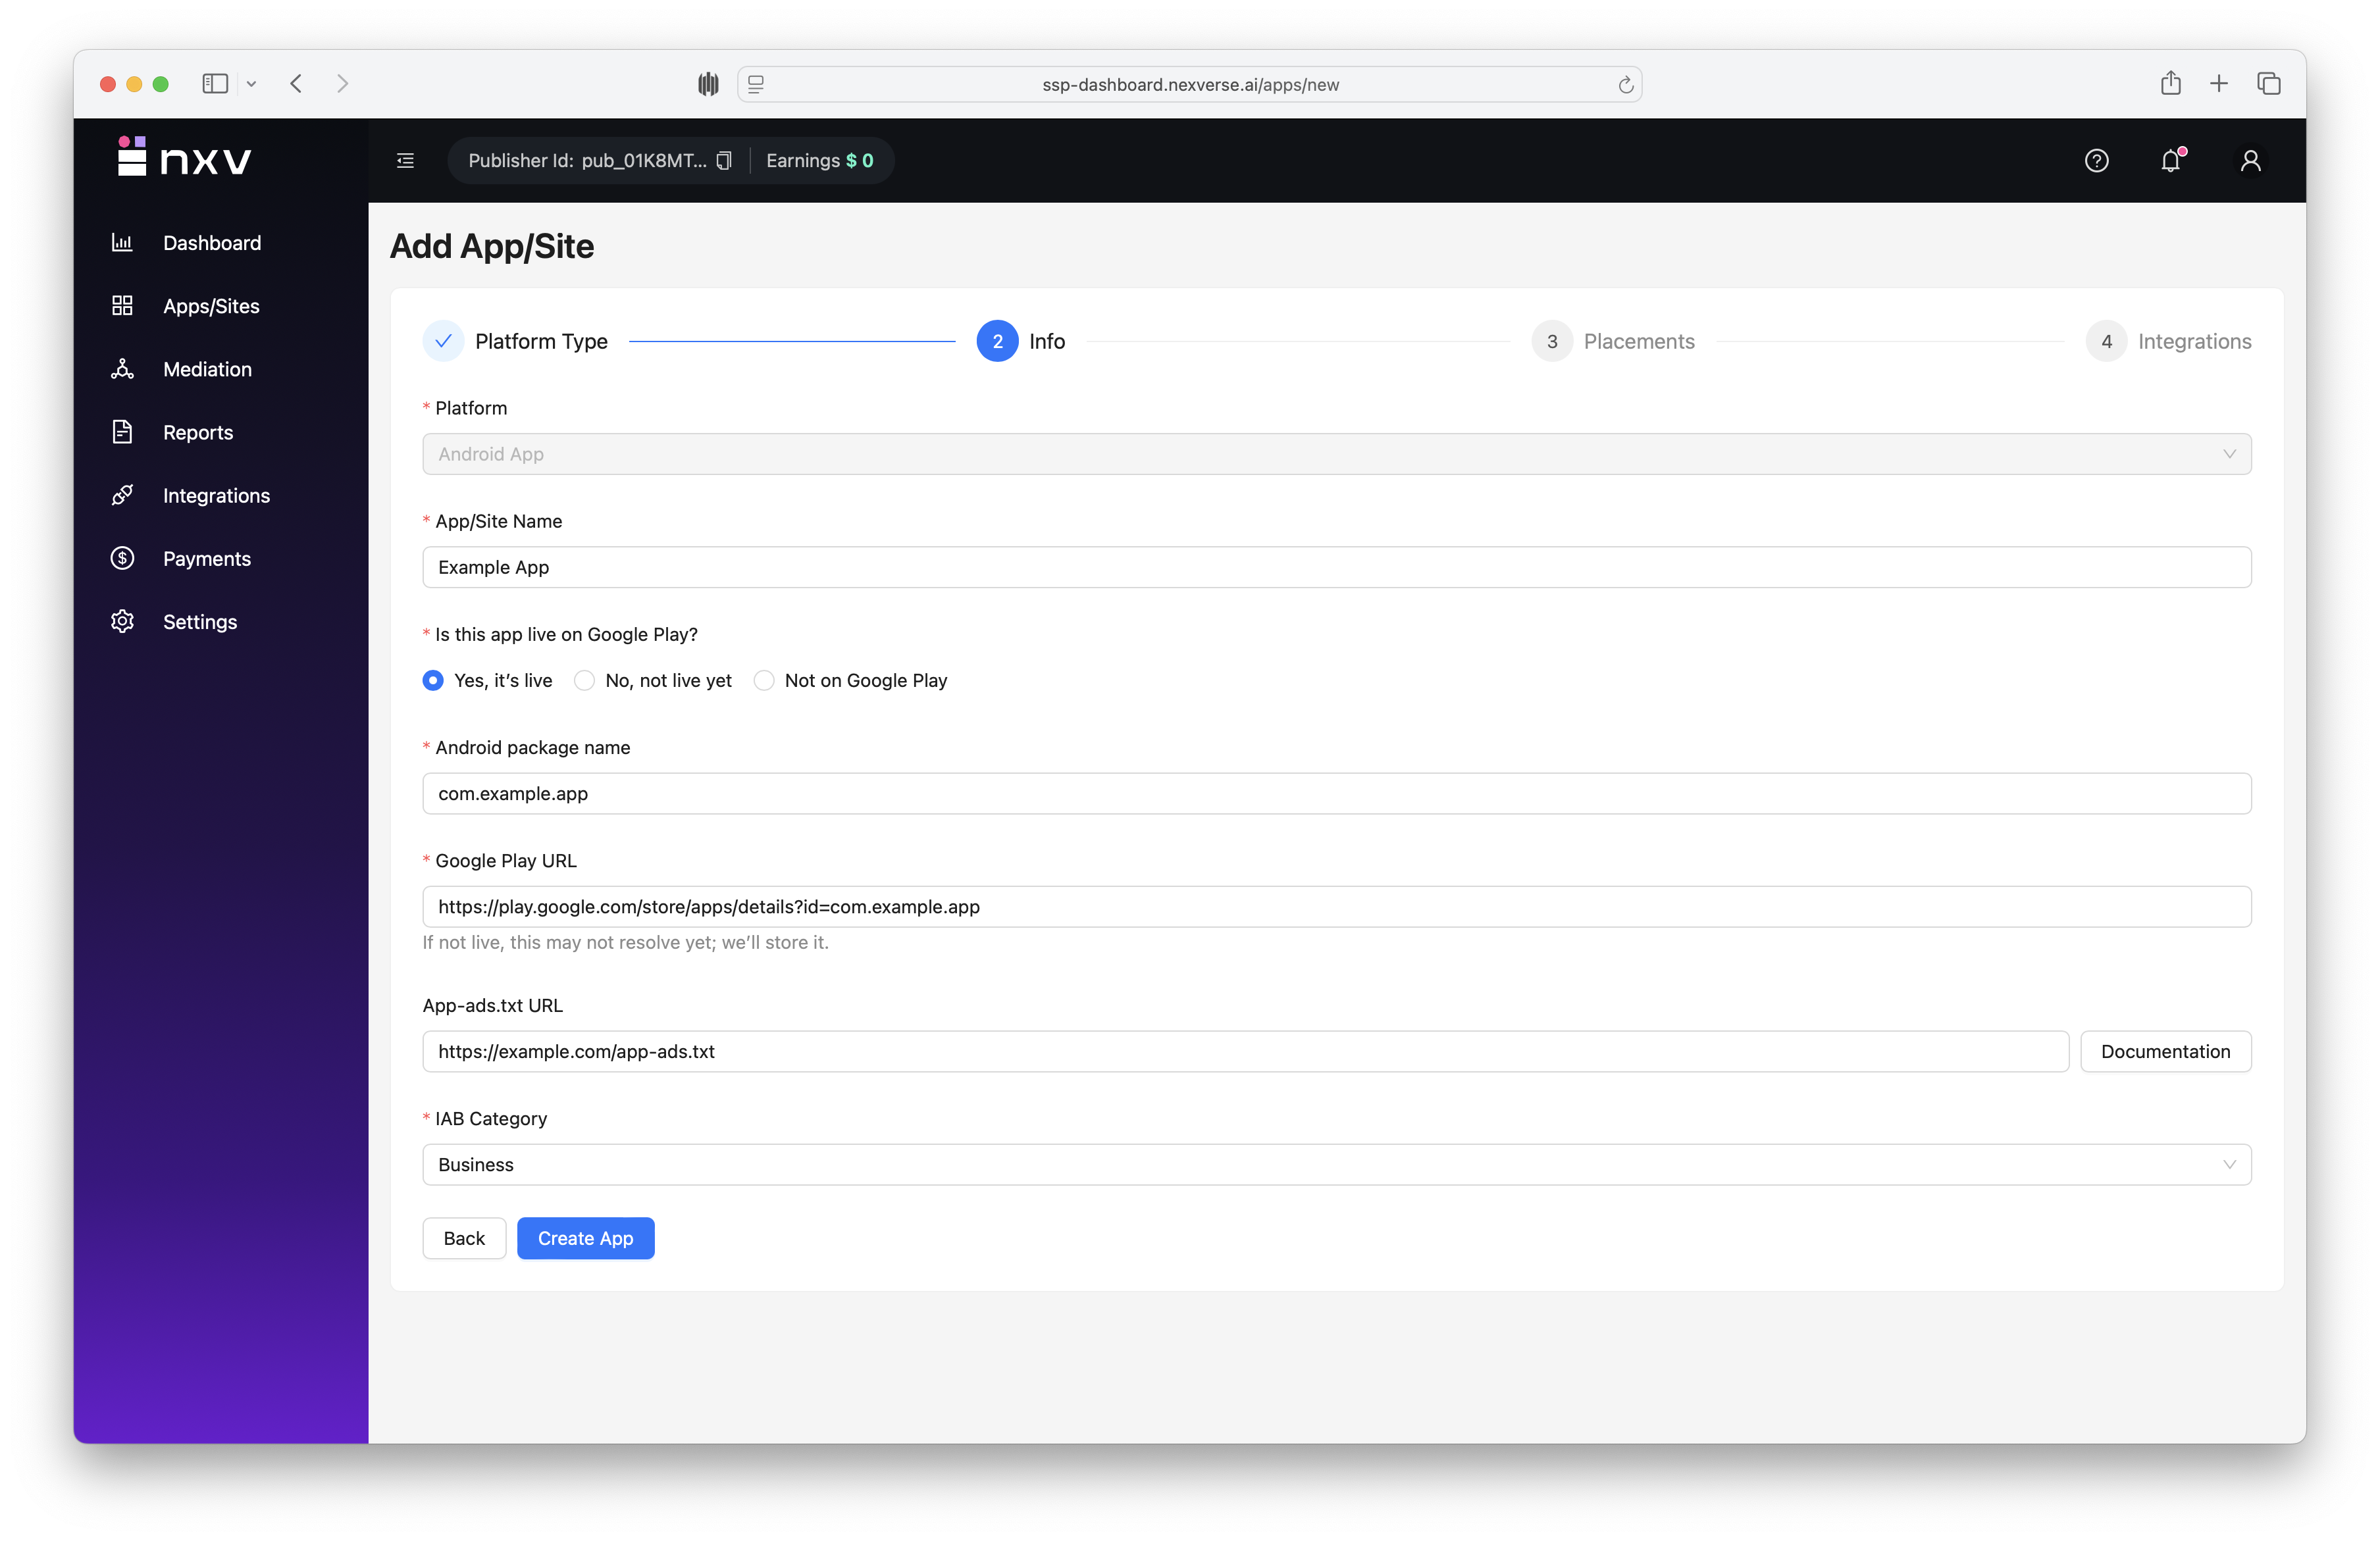
Step 3. Submit app metadata
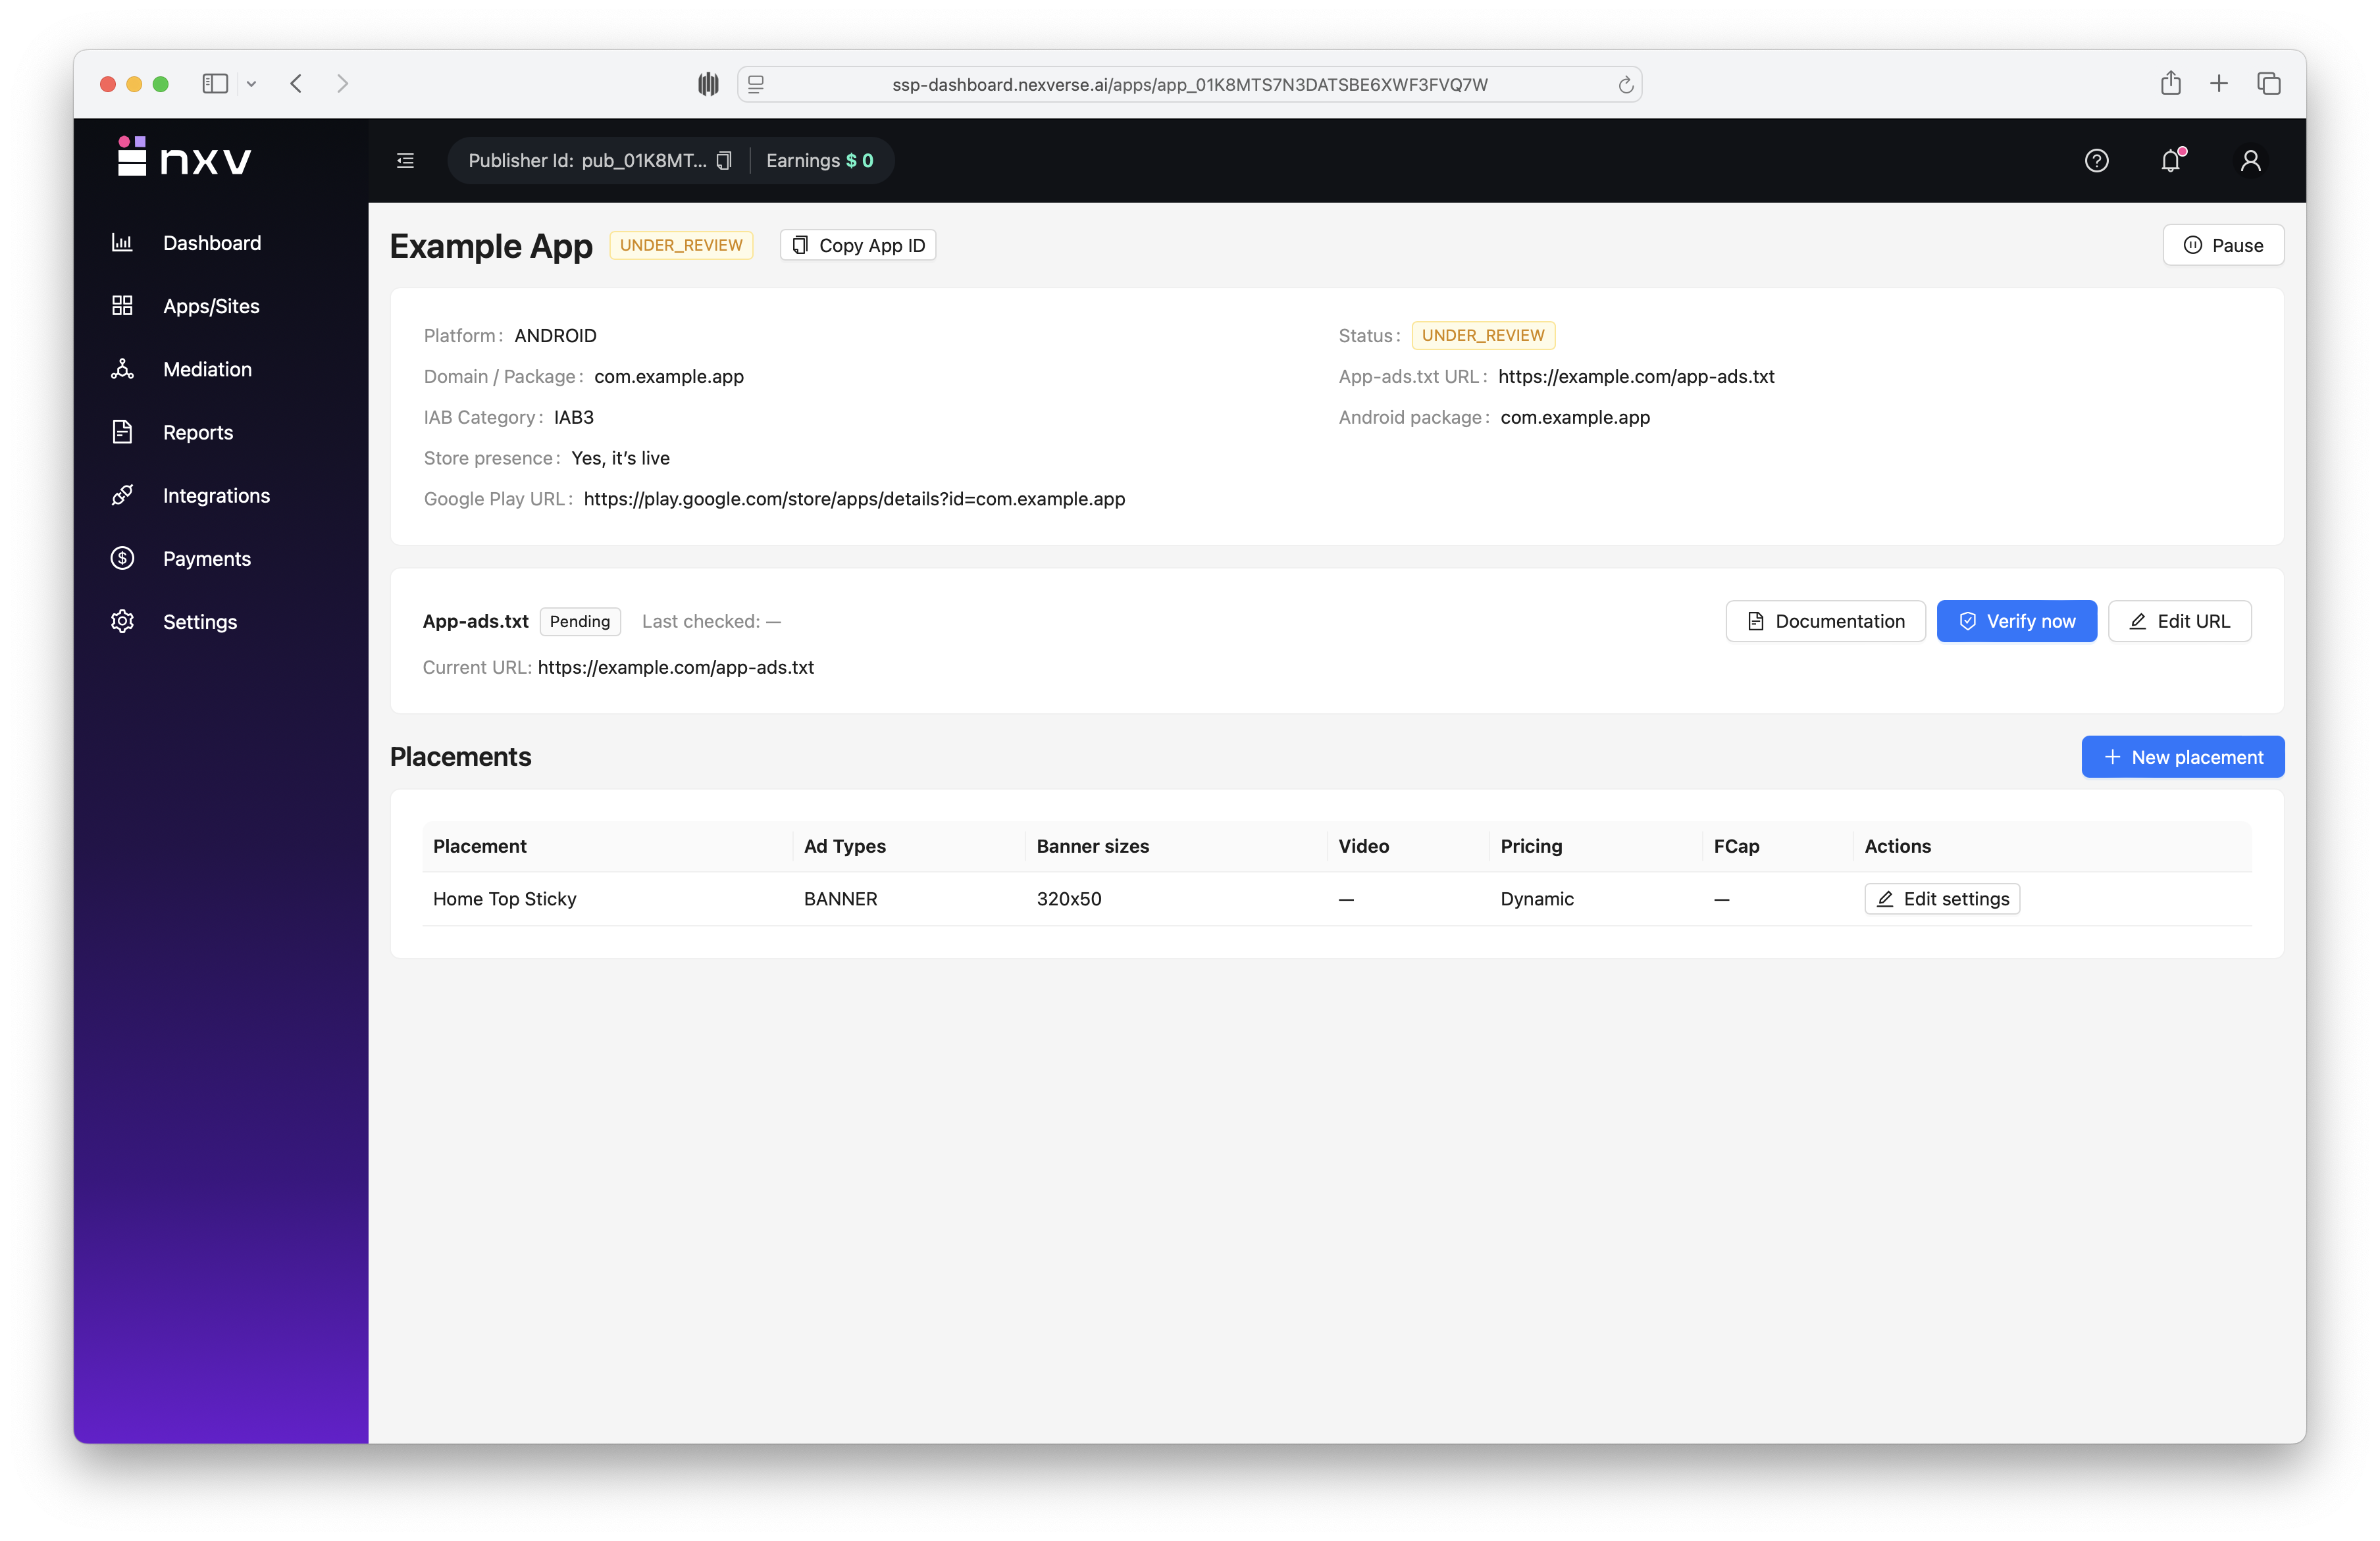
- Complete every field in the App Details form to enable Nexverse compliance to validate the property.
- App / Site Name: Enter the merchandising name exactly as presented to end users.
- Store URL: Paste the live Google Play, App Store, or public website URL. If the listing is in review, supply the staging link and specify the planned go-live date in the description.
- Bundle / Package ID: Provide the identifier that ships with your production build (for example,
com.example.newsapp). - Category and Sub-category: Select the options that best describe the content so demand partners can classify the inventory accurately.
- Regulatory Flags: Declare whether the experience is directed to children (COPPA) and whether limited data processing is required for GDPR or similar privacy regulations.
- Add a concise product description and a monitored contact email address for escalation requests.
- Review the validation indicators beside each field. Proceed only when every mandatory input is marked complete, then choose Next.
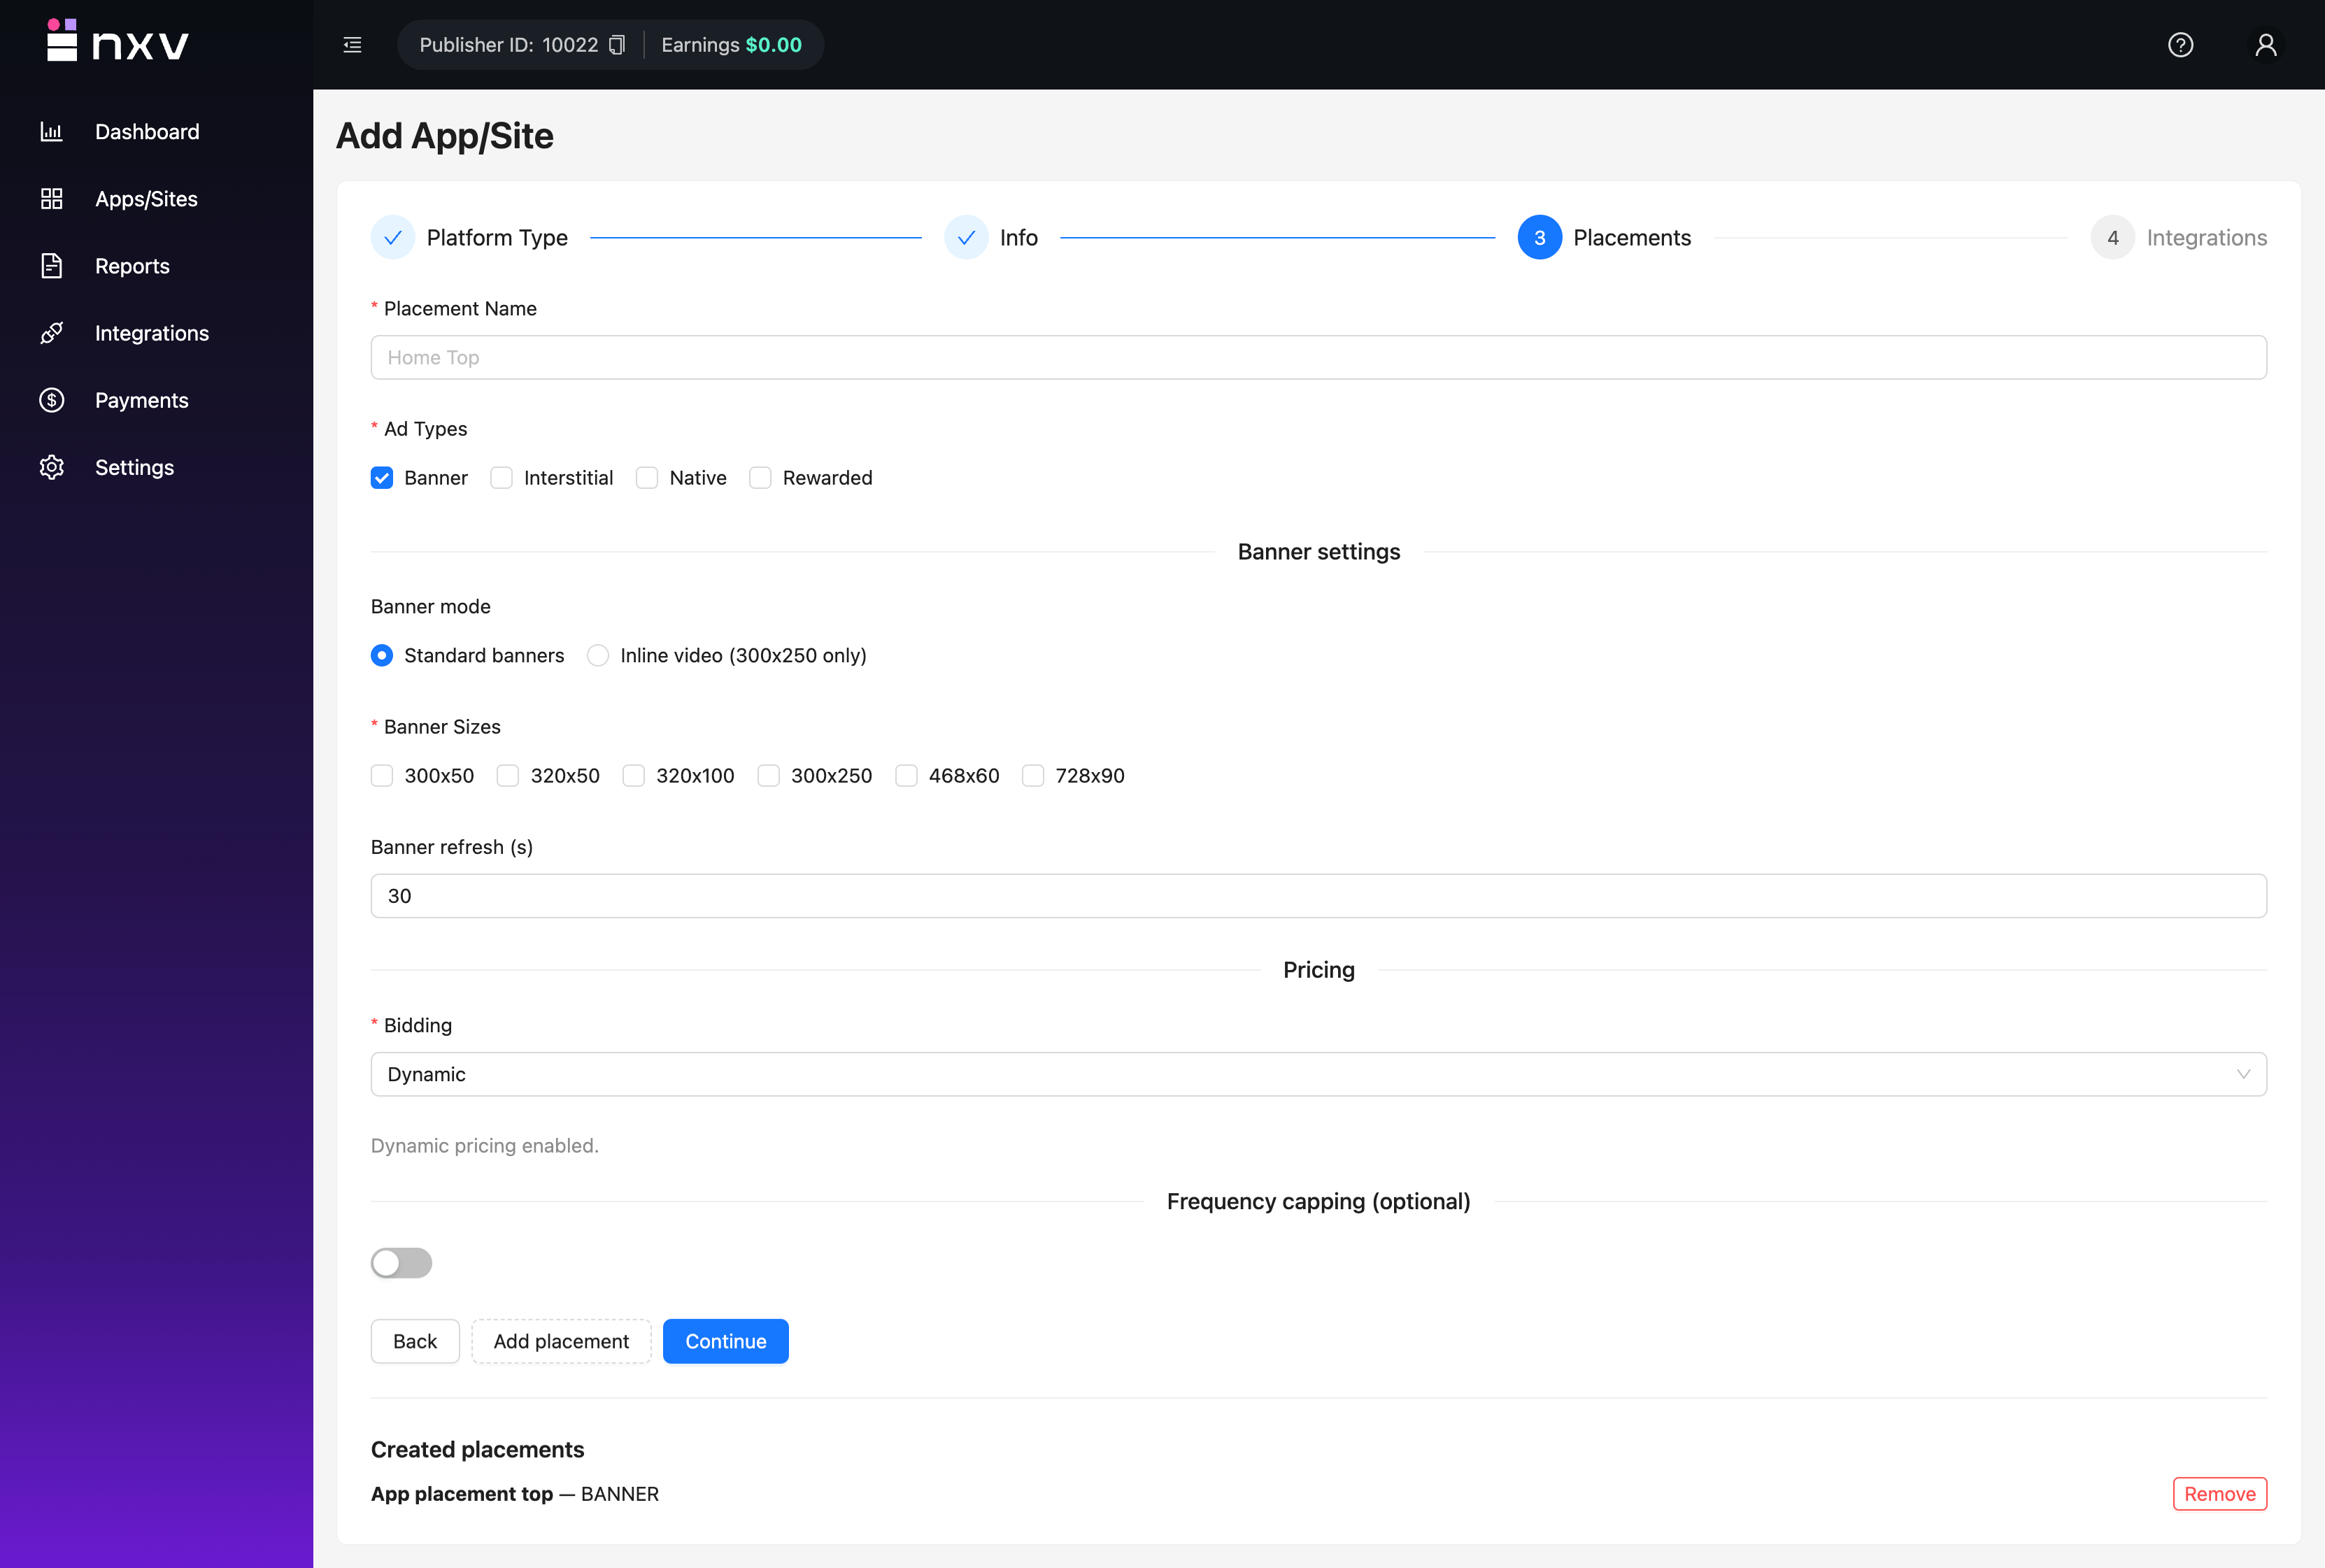
Step 4. Configure placements
- Create at least one placement so the Nexverse SDK has a valid ad unit to request.
- Placement Name: Adopt a descriptive naming convention such as
Home_Banner,Article_Interstitial, orLevelComplete_Rewardedto simplify reporting. - Ad Format: Select the format (Banner, Interstitial, Rewarded, Native, or Video) that matches the surface where the placement will render.
- Refresh Interval and Frequency Caps: Configure pacing rules that align with your user-experience guidelines.
- Floor Price (optional): Enter a minimum CPM if your monetisation policy mandates fixed price floors; leave blank to allow automatic optimisation.
- Placement Name: Adopt a descriptive naming convention such as
- Use Add Placement to configure additional ad units before continuing. Each placement is assigned a unique identifier once the app is approved.
- Confirm that the placement table lists every ad unit required for the initial launch, then click Next.

(Optional) Add additional placements
If you need to add additional placements to the app. Once done, click Continue.
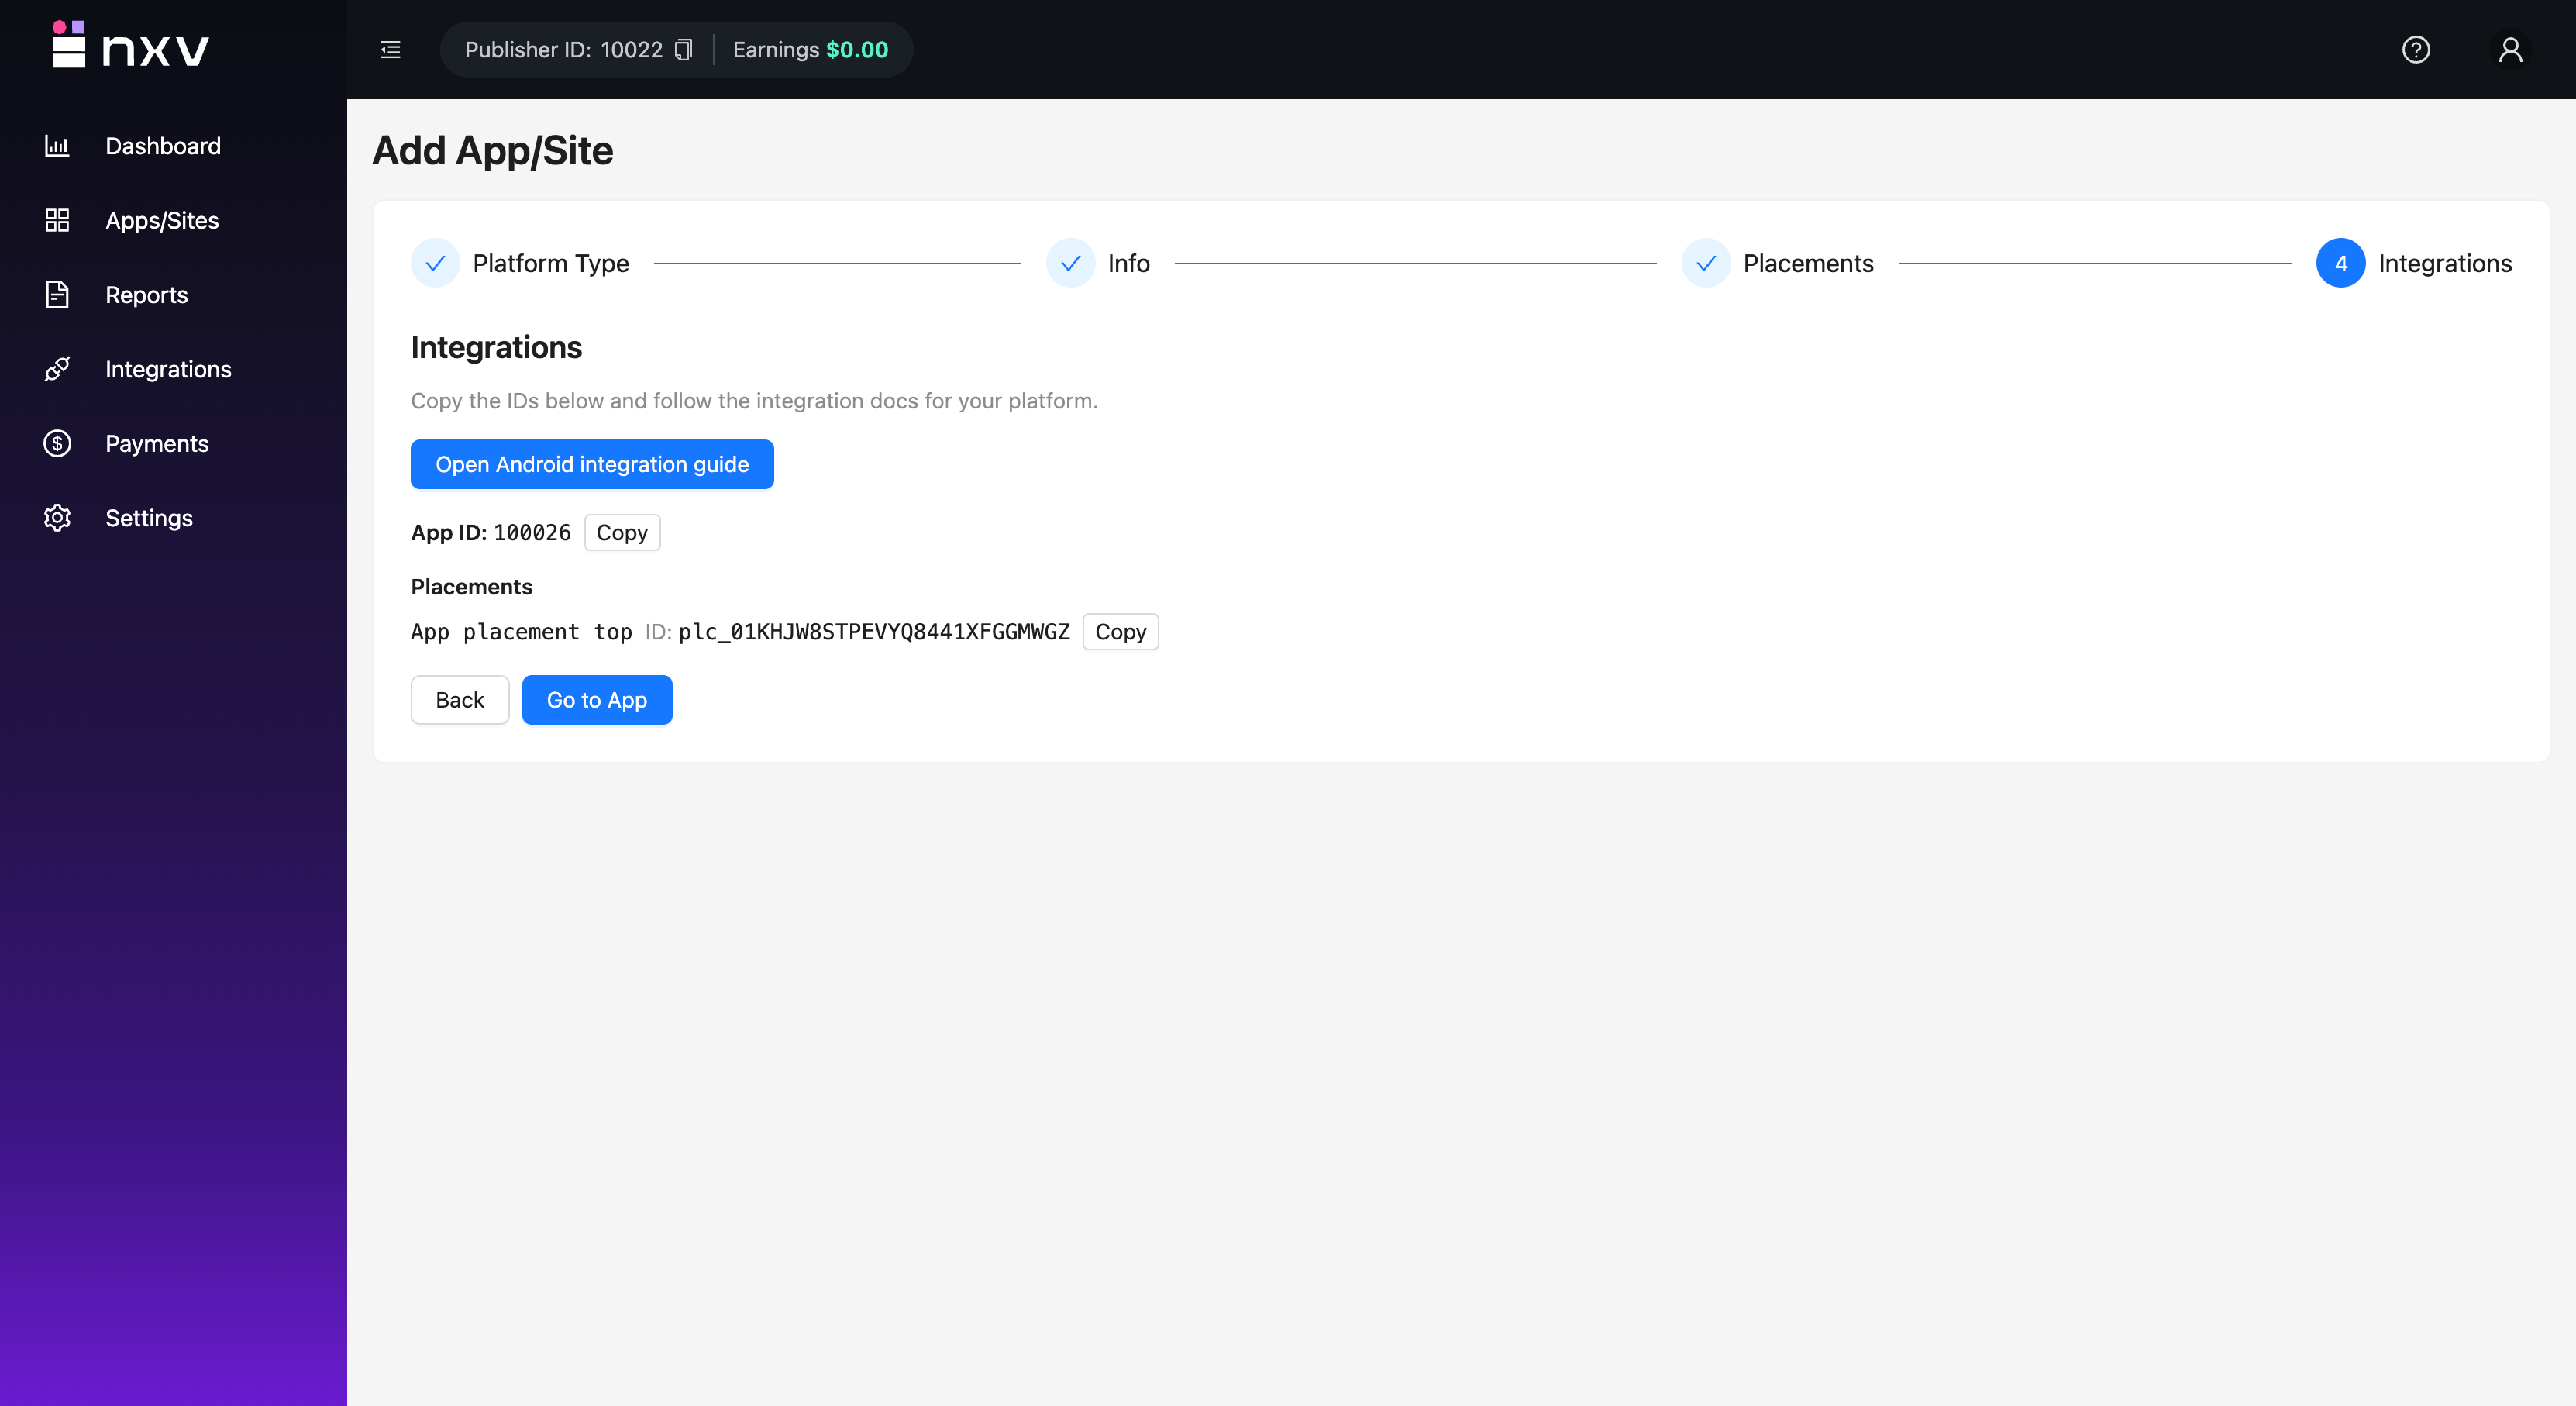
Step 5. Integration details
You should copy all details from this page. You will need them to integrate the Nexverse SDK in your app.
Step 6. Validate and submit for compliance review
- Examine the summary screen thoroughly. Confirm that the platform, metadata, and placement details match the information you intend to submit.
- Use Back to correct any value before submission. Editing an app that is already under review restarts the compliance cycle, so finalise the dataset first.
- Select Submit to send the application to Nexverse compliance. The dashboard displays the app in a
Pending Reviewstate until validation is complete.
Nexverse typically reviews new apps within one business day. Monitor the registered contact inbox so you can respond quickly to any clarification requests.
Step 7. Monitor activation and retrieve credentials
- Track the status column on the app list. The record changes from
Pending ReviewtoActiveafter compliance approval. - When the status is
Active, open the action menu to copy theaccountId,configId, and placement identifiers required by the Nexverse SDK. - Download the configuration summary for your internal documentation and use the same menu to pause delivery or edit placements when future changes are needed.

Next steps
- Distribute the newly created
placementIdalong withpublisherIdandappIdand identifiers to developers so that each ad surface in the codebase references the correct unit. - Once traffic is live, review performance in the Reports tab and revise placement settings as required to protect user experience quality and monetisation outcomes.